1. Click on one of the two ‘+ CREATE DOCUMENT’ buttons.
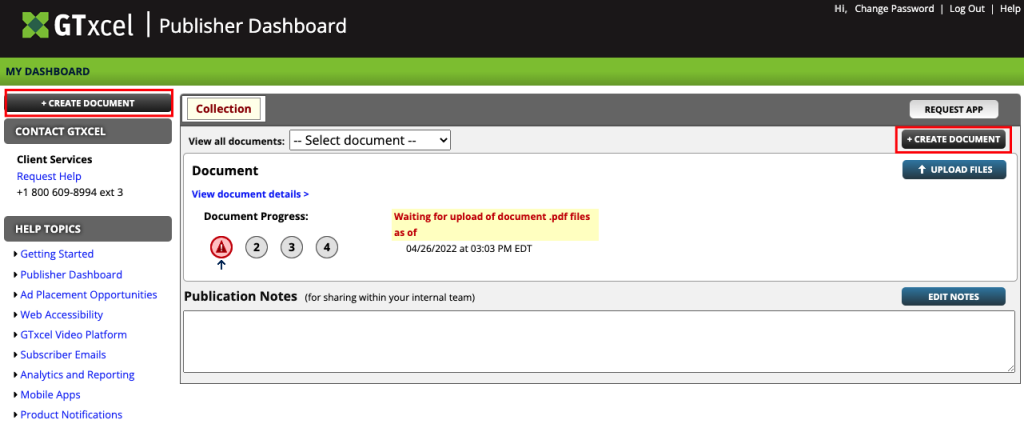
2. A popup window will appear. Select the collection you are creating the document for.
If you are a Publisher with multiple collections, the collection will default to the collection you were in when the “CREATE DOCUMENT” button was clicked on, but you can select another collection once the new document popup window loads.

3. Enter your Document Name
The Document Name should be unique to the document you are creating.
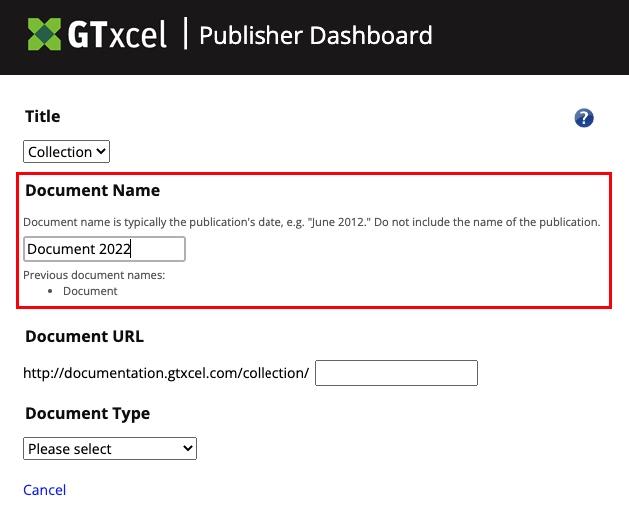
You should not include the name of the collection, this will be applied automatically as needed.
NOTE: All non-accented letters, numbers, periods, commas, apostrophes, dashes, underscores, ampersands and slashes are accepted.
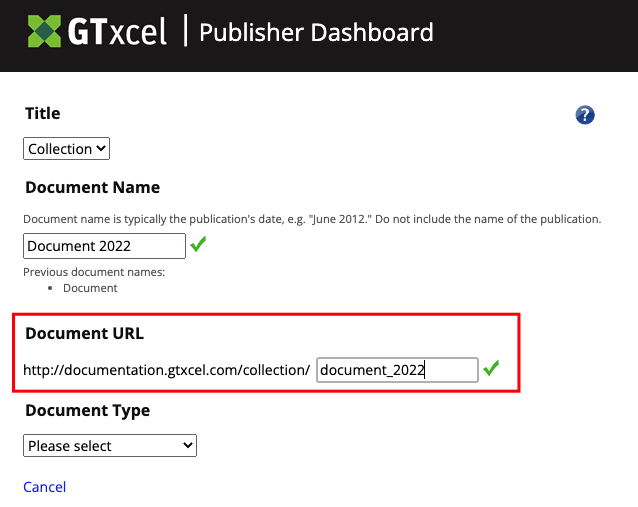
4. Verify or Modify the Auto-Generated Document URL
The Document Name will automatically be converted to a URL value (the direct link to access the web edition of this document). You are able to update that URL as needed. The document URL MUST be a unique value, you cannot have multiple documents within a collection with the same URL.
5. Select the Document Type
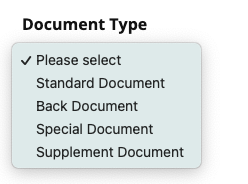
- Standard Document – This should be used for the majority of your documents.
- Back Document – Select when uploading past documents that you would like included in your library.
- Special Document – Select when uploading a special document outside of your standard documents.
- Supplement Document – Select when uploading supplemental documents.
6. Hit the ‘CREATE DOCUMENT’ Button
Once all of the items have been filled out, the ‘CREATE DOCUMENT’ button will appear. Click on the ‘CREATE DOCUMENT’ button and your new document will be created and ready for you to upload files to.
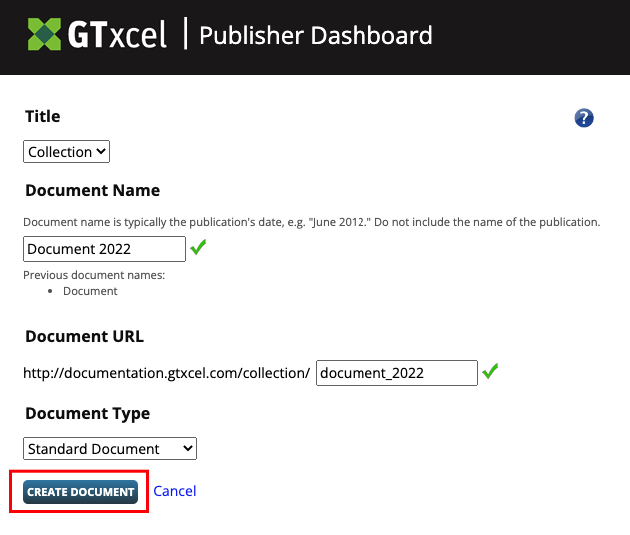
You may hit ‘Cancel’ or close the window at any time during this process. If you cancel, your document will not be created.

 Contact Support