What is on this page?
Creating a new TOC entry
Editing an existing TOC entry
Deleting a TOC entry
NOTE: Edits to the Page View TOC will reflect on documents on the Turnstyle platform or ACE platform with the Text TOC enabled.
Navigation:
TOC Tab – allows you to make edits to existing TOC entries, as well as creating new entries.

Modes:
Select Tool – use to select already created entries.

Add TOC entry tool – use to create a new TOC entry.

Actions:
Undo/Redo – undo or redo an edit.

Delete – use the X icon to delete an entry.

Creating a new TOC Entry
1. Select the PAGE EDITOR button for the Document you would like to make edits to.
2. Select the TOC tab at the top of the left hand column.

3. Click on the ‘Add TOC Entry’ button under Mode.

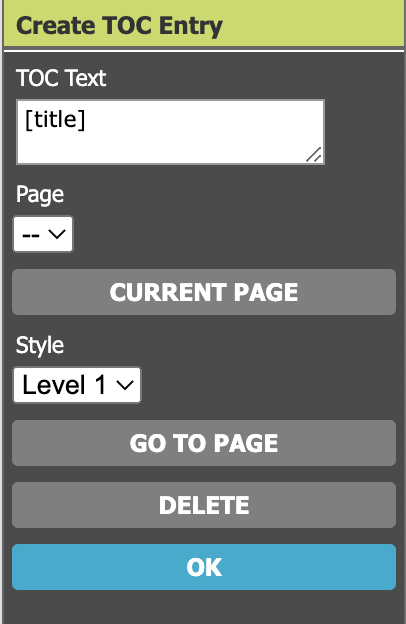
4. Edit the properties of the new TOC entry.

- TOC Text – type in your text for the TOC entry.
- Page – Select the page that the TOC should link to. The ‘CURRENT PAGE’ button will automatically select the page you are currently on.
- Style – There are two options, Level 1 and Level 2. Level 1 will appear as a heading, Level 2 will show under a Level 1 with a page number next to the text.
- GO TO PAGE – will bring you to the page you selected (if you are not already on the selected page).
- DELETE – this will delete the entry.
- OK – this will save your new TOC entry and make it appear on the left rail with the other entries.
5. Drag and drop the new TOC entry to the desired position.
NOTE: New entries by default will be placed at the end of existing TOC entries. If desired, you can control the initial placement of the entry by selecting an existing entry before clicking on the Add button. The new item will be added after the selected entry.
Editing an existing TOC entry
1. Select the PAGE EDITOR button for the Document you would like to make edits to.
2. Select the TOC tab at the top of the left hand column.

3. Edit the properties of the TOC entry you need to edit.

- TOC Text – Click on the “TOC Text” box to make changes to the text label for the selected TOC entry.
- Page – Use the pulldown menu of all available pages to modify the page destination. The ‘CURRENT PAGE’ button will automatically select the page you are currently on.
- Style – Choose from the dropdown to modify the entry style. Level 1 will appear as a heading, Level 2 will show under a Level 1 with a page number next to the text.
- GO TO PAGE – will bring you to the page you selected (if you are not already on the selected page).
- DELETE – this will delete the entry.
- OK – this will save your new TOC entry and make it appear on the left rail with the other entries.
TOC Entry Position
To modify the sequence that your entries appear in, select individual entries and drag/drop them to the desired position in the TOC list pane.
Deleting a TOC entry
1. Select the PAGE EDITOR button for the Document you would like to make edits to.
2. Select the TOC tab at the top of the left hand column.

3. Select the TOC entry you would like to delete.
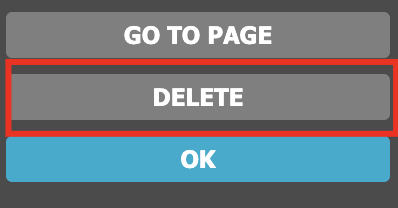
4. There are two options to delete an entry.
The “DELETE” button in properties box on the right hand side of the screen:

The X button under the Actions on the top of the left hand rail:


 Contact Support